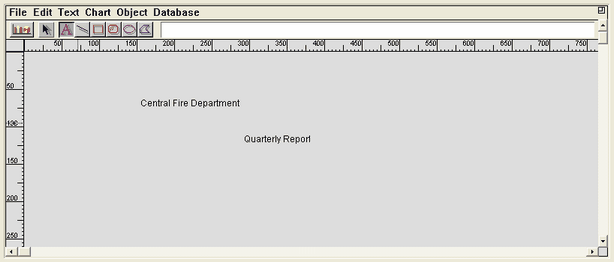
Here's the procedure for creating a title slide for a presentation.
1. Press the "Presentations" button to go the to Presentations list view.
2. Press the "New" button.
3. Press the "New Title Slide" button.
4. When requested enter a name for the title slide.
5. Press the "A" text tool button and drag a text area onto the layout area below.
6. Type a line of text and repeat for as many text areas as you wish.
7. Press the "Arrow" button and click on a text area to select it.
8. Under the "Text" menu select options to change your font, text size and color.

9. Position the text the way you want it on the screen.
10. Press the "View" button to see how your new text will look.
11. If you wish, press "Edit" to reedit the slide.
12. When you are done press the "Accept" button.
13. At the Presentation list view double-click on the title of your title slide.
14. See how the title slide will appear.
15. You may edit the slide by pressing the "Edit" button or enter more information about the slide by pressing the "Data" button.
To add to Presentation functionality each Present type has its own list of options. Here are the options for title slides:

If you select "View Title Slide" Information you will see the title of the slide as well as information about when it was created. You will also see any slide description you have typed under the Data button.
The "Copy Picture of Slide to Clipboard" option will take a picture of the slide and copy it to the computer's clipboard for pasting wherever you wish.
"Copy Picture of Slide to Clips" works like the clipboard except NFIRS 5 Alive clips function will store multiple pictures and text documents. You may title the documents and rapidly locate documents whenever needed. Clips do not save in the demo version, but do save in the full featured version of NFIRS 5 Alive.
"Save Picture of Slide as a Picture" will create a new Picture record with a picture of the slide in the record.
"Create Email with Picture Disk File Attachment" will first allow you to identify the folder where you want the attachment photograph to be saved. It will then bring up the NFIRS 5 Alive Email dialog. This dialog allows you to address emails and assemble the body of your email from pre-stored paragraphs of text. Text for the body of your email is automatically loaded into the clipboard. Follow the instructions on the screen. Your email program will be automatically called-up and loaded with address information. Click on the body area of your email and "paste" your email text from the clipboard. Add a subject and attach the file you created and your email is ready to send.
"View Clipboard" will display the contents of the clipboard.
"View Clips" will display a dialog of Clips. To view a clip just click on it's title. You may copy any clip to the clipboard with the press of a button.