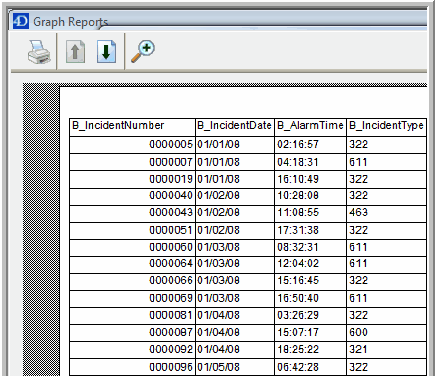
Quick reports are column-style (List) or grid-style (Cross Table) printouts. Use Quick reports to create lists of incidents or to print out any column report.
Press the "Quick" button. Press the "Incidents" button. You can double-click on an existing report record to open it.
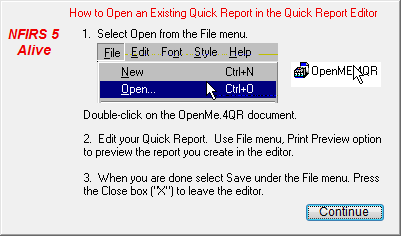
Follow the instructions that appear on the screen. Quick reports store a bit differently. You must open the report by selecting "OpenMe.4qr" from the open file dialog. The instructions will illustrate how that's done.

The "OpenMe.4qr" file is generally located inside the NFIRS 5 Alive application folder. If you don't see it right away, simply navigate to the N5A application folder and look inside.
In this case, let's start from scratch.
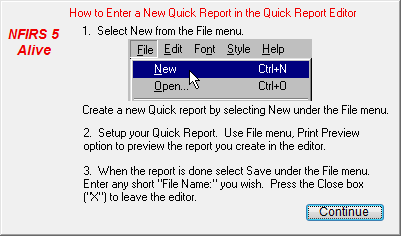
1. Press the "New" button to create a new report.
2. Enter a Report Name, Description and Key Words.
3. Press the "Preview" button.
4. Use a limited sample of 200 records to test your new report.
5. Now follow these instructions when they appear:

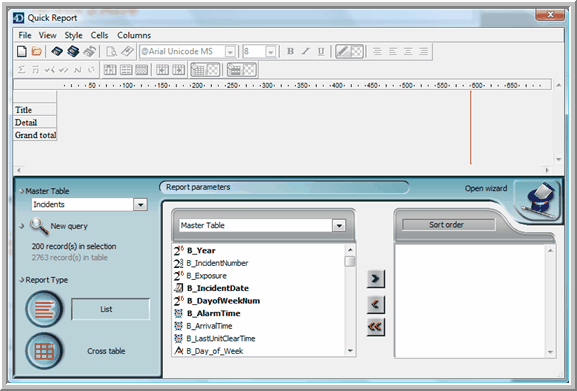
Once you have opened the existing report format you will see the Quick Report Editor. The fastest way to become familiar with the Quick Report editor is to press the "Open Wizard" button. This area is designed to take you step-by-step through the report set-up process.

The "List" report is used when you want to create a traditional report with rows representing individual records and columns representing field values.
The "Total" row can be used to provide counts, minimums, maximums, sums and averages. You can place a count in a total cell for an alpha field. Counts simply provide you with the number of records processed. In columns referenced to a numeric field you can add counts, minimums, maximums, sums and averages.
Start by setting-up any List report you wish.
Now click on the title at the top of a column. This should select the entire column. See how the check boxes in the Column area (right side of editor) allow you to set the column for automatic sizing. If the automatic sizing check box is not checked you can "grab" the dotted line on the right side of the column (do this near the top of the column) and drag the column sizing larger or smaller. This "drag" option is disabled if your column is set to "Automatic Width".
When working with Incidents most Quick Report fields will be linked to a field in the Incidents table. You may, however, wish to take a field from the Descriptions table when you wish to print the description of a code.
For example, NFIRS 5 Alive stores NFIRS 5 codes, like "111" for structure fire, in the Incidents table. It stores the words for the code description, "Structure Fire", in a related table called Descriptions. If you wish to access the Descriptions table scroll down the list of Incidents fields until you find the linking field called "Key_x". If you use the expand option you will see a list of Description fields available to be dragged below to add columns to your report.
Once you have setup a simple report you can view it by selecting "Print Preview" from the File menu.

Remember, when you are done setting-up your report you must select "Save" under the File menu. Use any name you want. NFIRS 5 Alive will provide an extension for the report name. Once the report format has been saved you may exit the Quick Report editor by pressing the "X" close box in the upper right corner of the Quick Report layout.
The Quick Report Editor is a part of regular NFIRS 5 Alive reporting. If you choose a Quick Report make sure you turn your printer on. Quick Reports go directly to the printer and are not stored in either Presentations or Documents.